
How to Design and Schedule Campaign Assets in Hubspot
Welcome to our comprehensive guide on designing and scheduling campaign assets in HubSpot. Crafting compelling marketing materials is only half the battle; timing is crucial for successful campaigns. In this guide, we'll walk you through the process of creating eye-catching assets using HubSpot's intuitive design tools and then strategically scheduling them for maximum impact. Whether it's emails, social media posts, or other content, mastering the art of design and timing will help you capture your audience's attention and drive meaningful engagement.
1
Log in to your Hubspot account
Log in to your Hubspot account and navigate to the main dashboard.
2
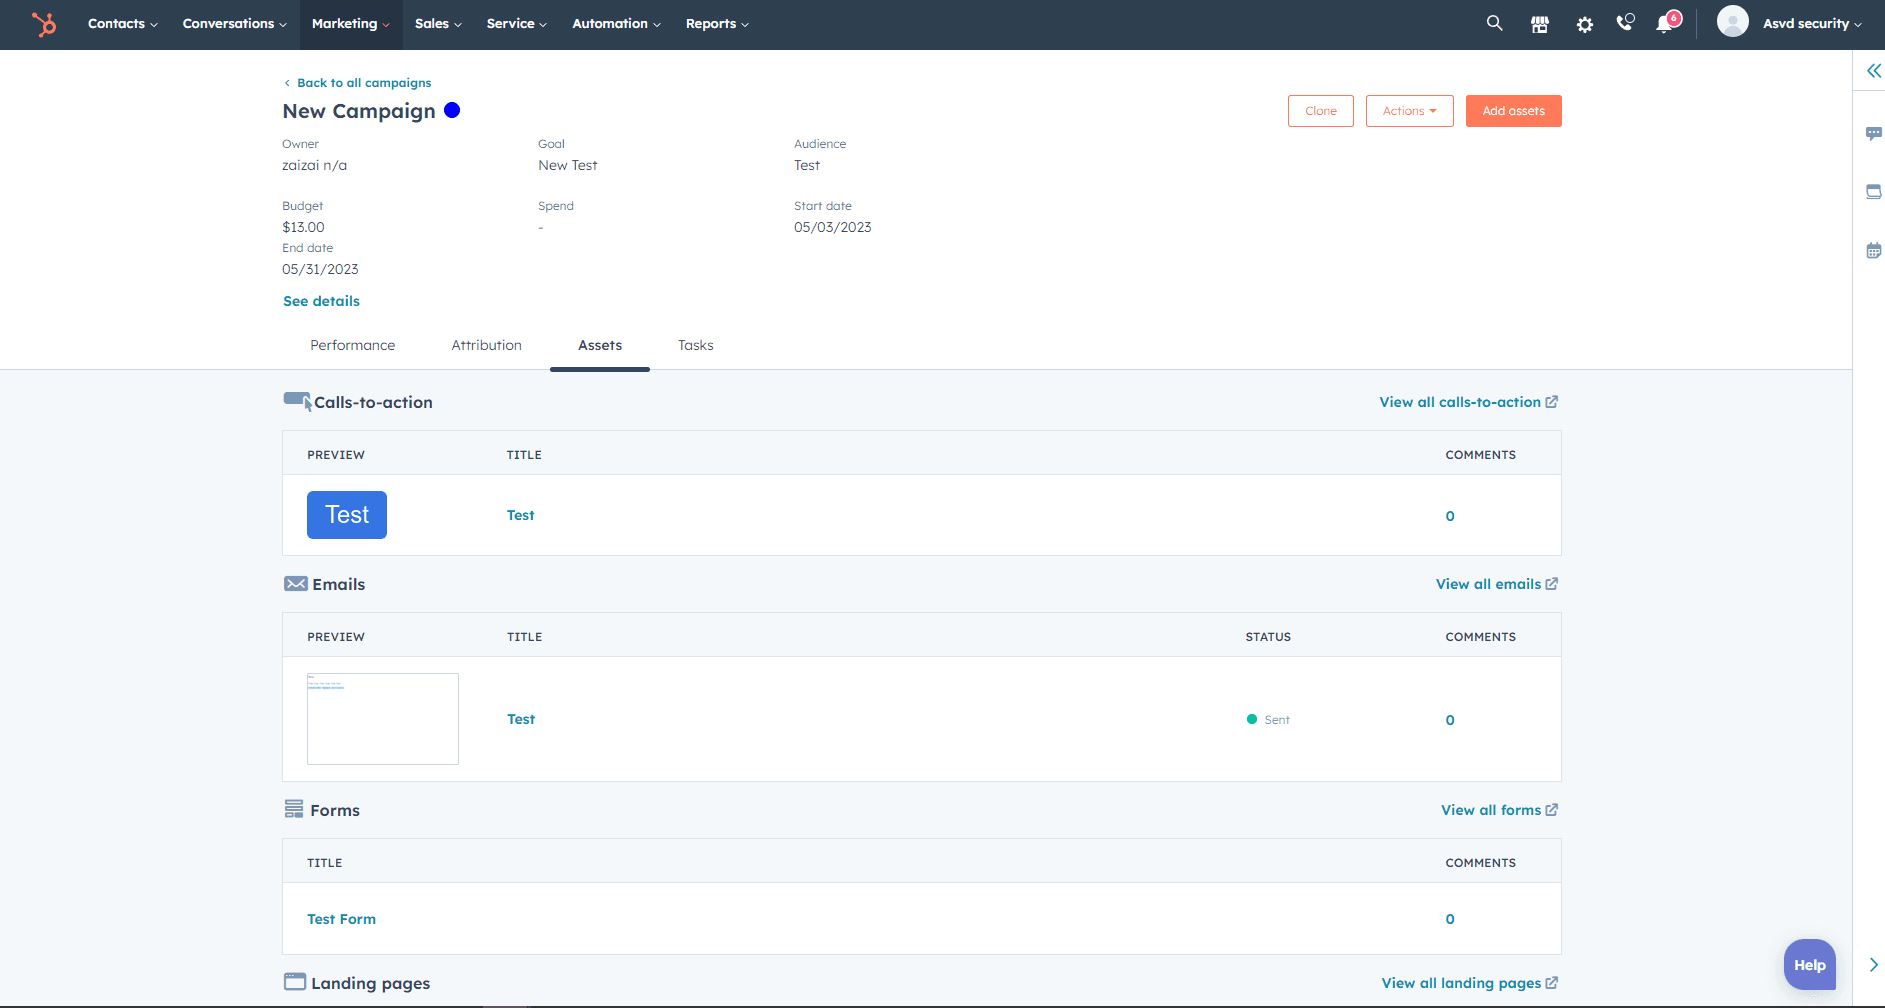
Access the Campaigns tool
Click on the "Marketing" tab located in the main navigation bar, then click on "Campaigns" from the drop-down menu.
3
Create or select a campaign
If you haven't already, create a new campaign by following the steps in the "How to Create a New Marketing Campaign in Hubspot" guide. If you already have a campaign, select it from the list of campaigns in the Campaigns tool.
4
Design campaign assets
To design your campaign assets, click on the "Assets" tab in your selected campaign. For each type of asset (e.g., emails, landing pages, blog posts, social media messages, and CTAs), click on the "Create new" button.
1
4.1
5
Use the design editor
After clicking "Create new," you will be directed to the design editor for the selected asset type. Use the design editor to create visually appealing and cohesive marketing materials that align with your campaign's goals and branding.
Image: Design editor interface with various editing options
- For emails and landing pages, use the drag-and-drop editor to add and customize content modules, such as text, images, buttons, and forms.
- For blog posts, use the rich text editor to format your content and add images, links, and CTAs.
- For social media messages, craft engaging copy and add images or videos to capture your audience's attention.
- For CTAs, customize the design, text, and link to encourage users to take the desired action.
6
Schedule campaign assets
Once you've designed your campaign assets, it's time to schedule them for publication.
- For emails, navigate to the "Send or schedule" tab in the email editor, and choose either "Schedule for later" or "Send now" based on your campaign timeline.
- For landing pages and blog posts, use the "Publish" tab in their respective editors to schedule their publication date and time.
- For social media messages, use the "Schedule" tab in the social media editor to choose the date and time when your message will be published on each connected platform.
7
Review and save your campaign assets
After designing and scheduling your campaign assets, review them to ensure they are properly set up and aligned with your campaign goals. Save your assets by clicking the "Save" or "Publish" button in each asset editor.
8
Monitor your campaign performance
As your campaign runs, regularly check the Campaigns tool to monitor your campaign's performance. Use the performance data to analyze the effectiveness of your marketing assets and optimize your campaign as needed.
Congratulations, you've successfully learned how to design stunning campaign assets and schedule them strategically in HubSpot. By combining the power of eye-catching visuals with the art of timing, you're poised to captivate your audience and drive impressive results. As you continue to refine your design skills and experiment with different scheduling strategies, remember that each campaign is an opportunity to learn and improve. Regularly analyze your campaign performance and gather insights to fine-tune your future efforts. With HubSpot's tools and your creative flair, you're equipped to create memorable campaigns that resonate with your audience and elevate your brand's presence.


