Back to Front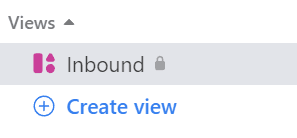
How to Create Custom Views for Tag-Based Email Segmentation
CRM
Learn to create custom views in Front for tag-based email segmentation. Make your inbox more manageable by sorting emails based on custom tags.
1
Navigate and Create Custom Views
Open your Front dashboard and go to the "Custom Views" section. Click the "New View" button to initiate the process.
2
Name Your View
Input a name for the custom view that aptly describes its purpose.
3
Set Up Filters
Under "Filters," select "Tags" as the attribute to segment by.
4
Choose the Tags
Pick the specific tags you want the custom view to show.
5
Apply Additional Filters (Optional)
If needed, add any more filters like "Sender," "Date," etc.
6
Save the View
Confirm your settings and click "Save."
7
Test the Custom View
Navigate to your new custom view to ensure it displays the emails with the selected tags.
Congrats, you've successfully created custom views in Front! Now enjoy a clutter-free, organized inbox.
CRM
How to Automatically Assign Incoming Emails in Front

CRM
How to Use Rules to Auto-Tag Conversations
CRM
How to Automate Follow-Up Reminders for Unanswered Customer Queries

CRM
How to Automatically Achieved or Delete Low-Priority Conversation
CRM
How to Implement Auto-Responses for Common Customer Inquiries


