Back to Salesforce
How to Optimize Lead Routing in Salesforce
Welcome to our comprehensive guide on optimizing lead routing in Salesforce. Efficient lead routing is crucial for maximizing sales opportunities and ensuring the right leads reach the right sales reps. In this guide, we'll walk you through the best strategies to streamline your lead distribution process and boost conversions.
1
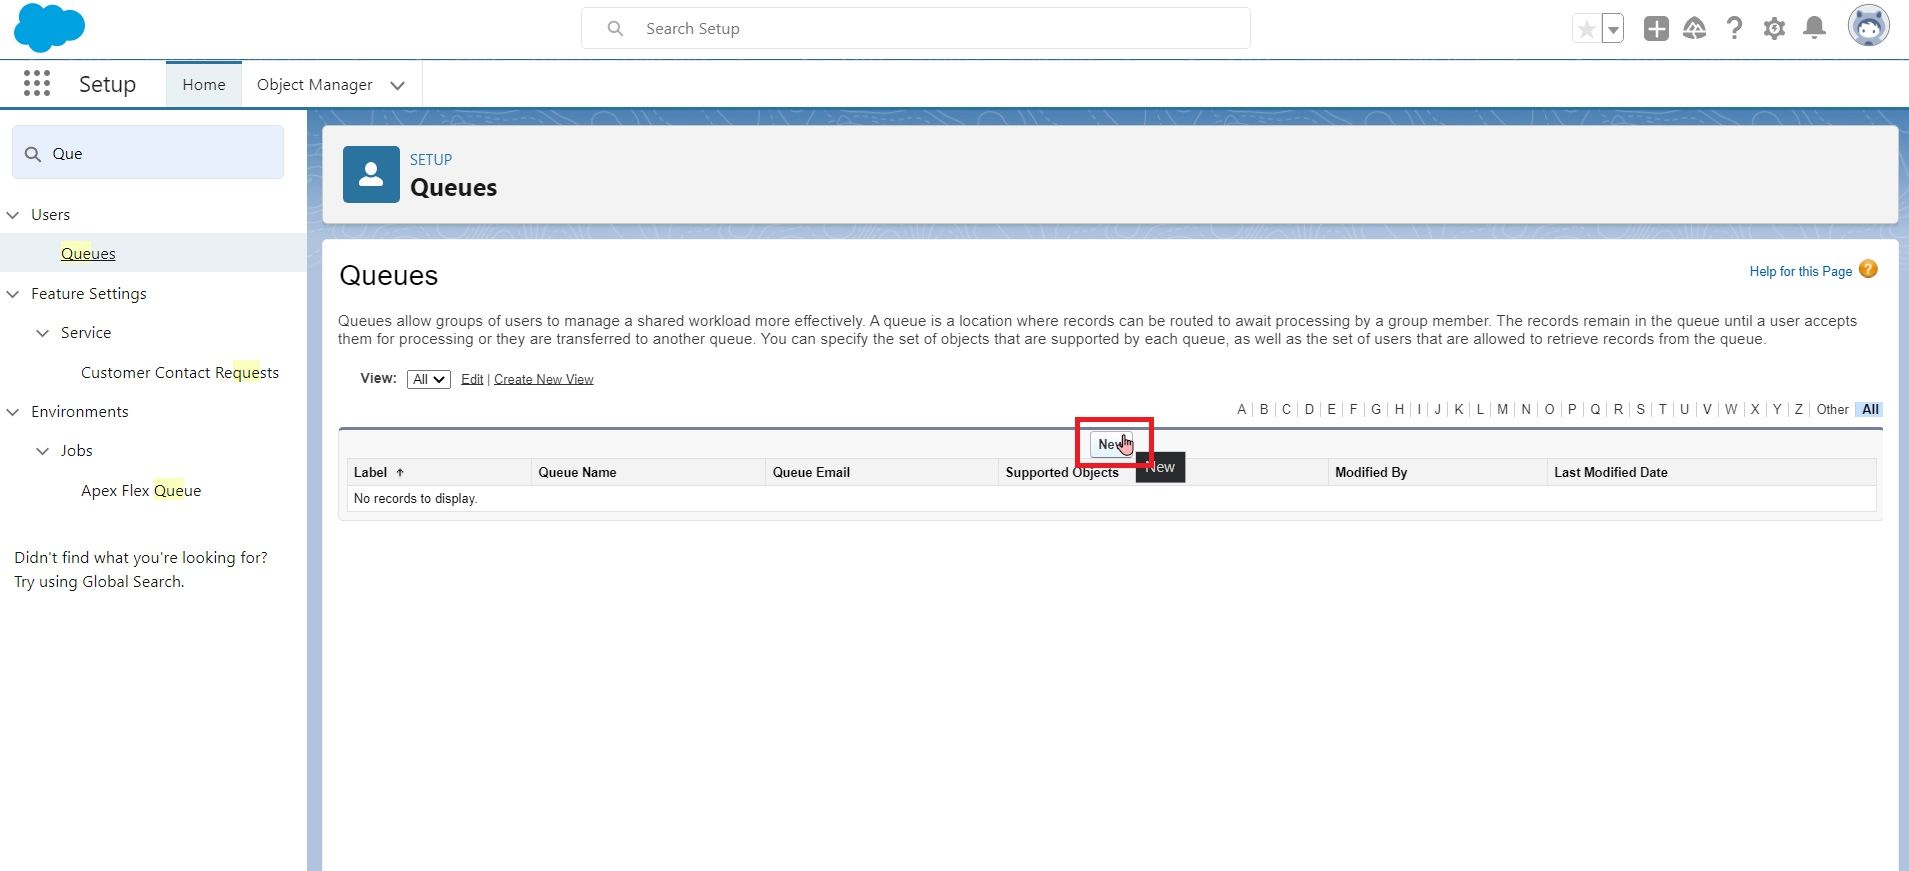
Navigate to Setup and search for "Queues" in the Quick Find Box
2
Click on "New Queue"
3
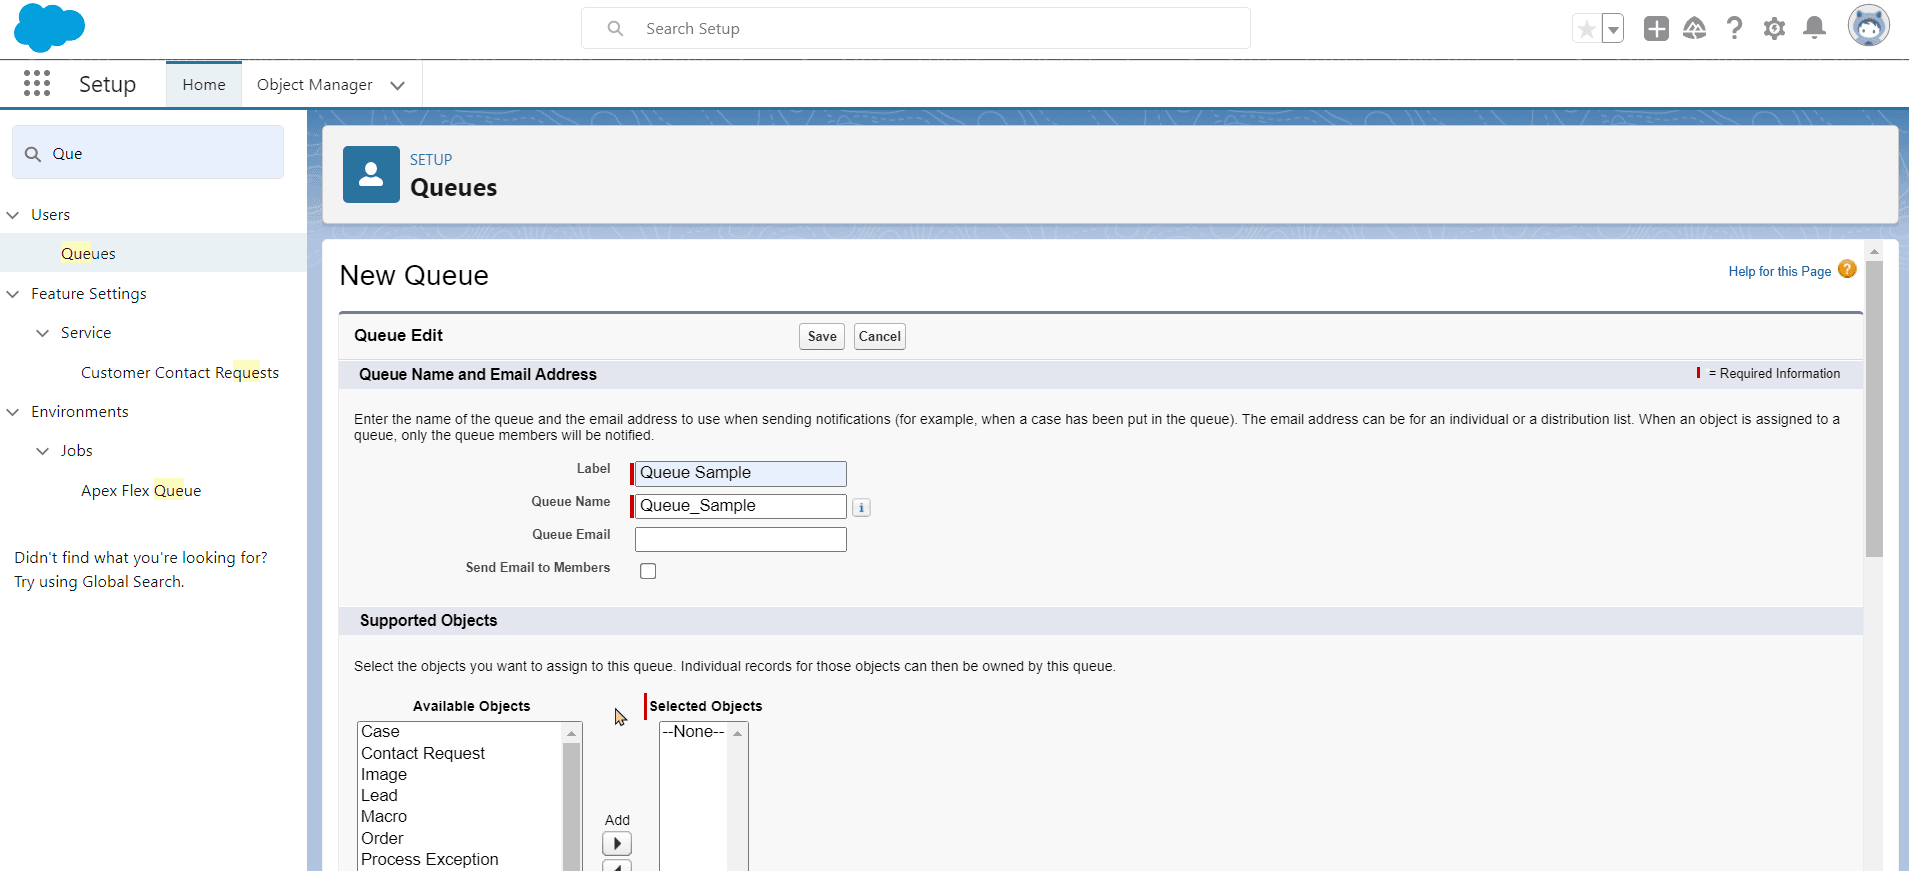
Give the Queue a name and if applicable, decide whether to use the email notification feature for queue members
4
Select the objects you want to assign to the queue.
5
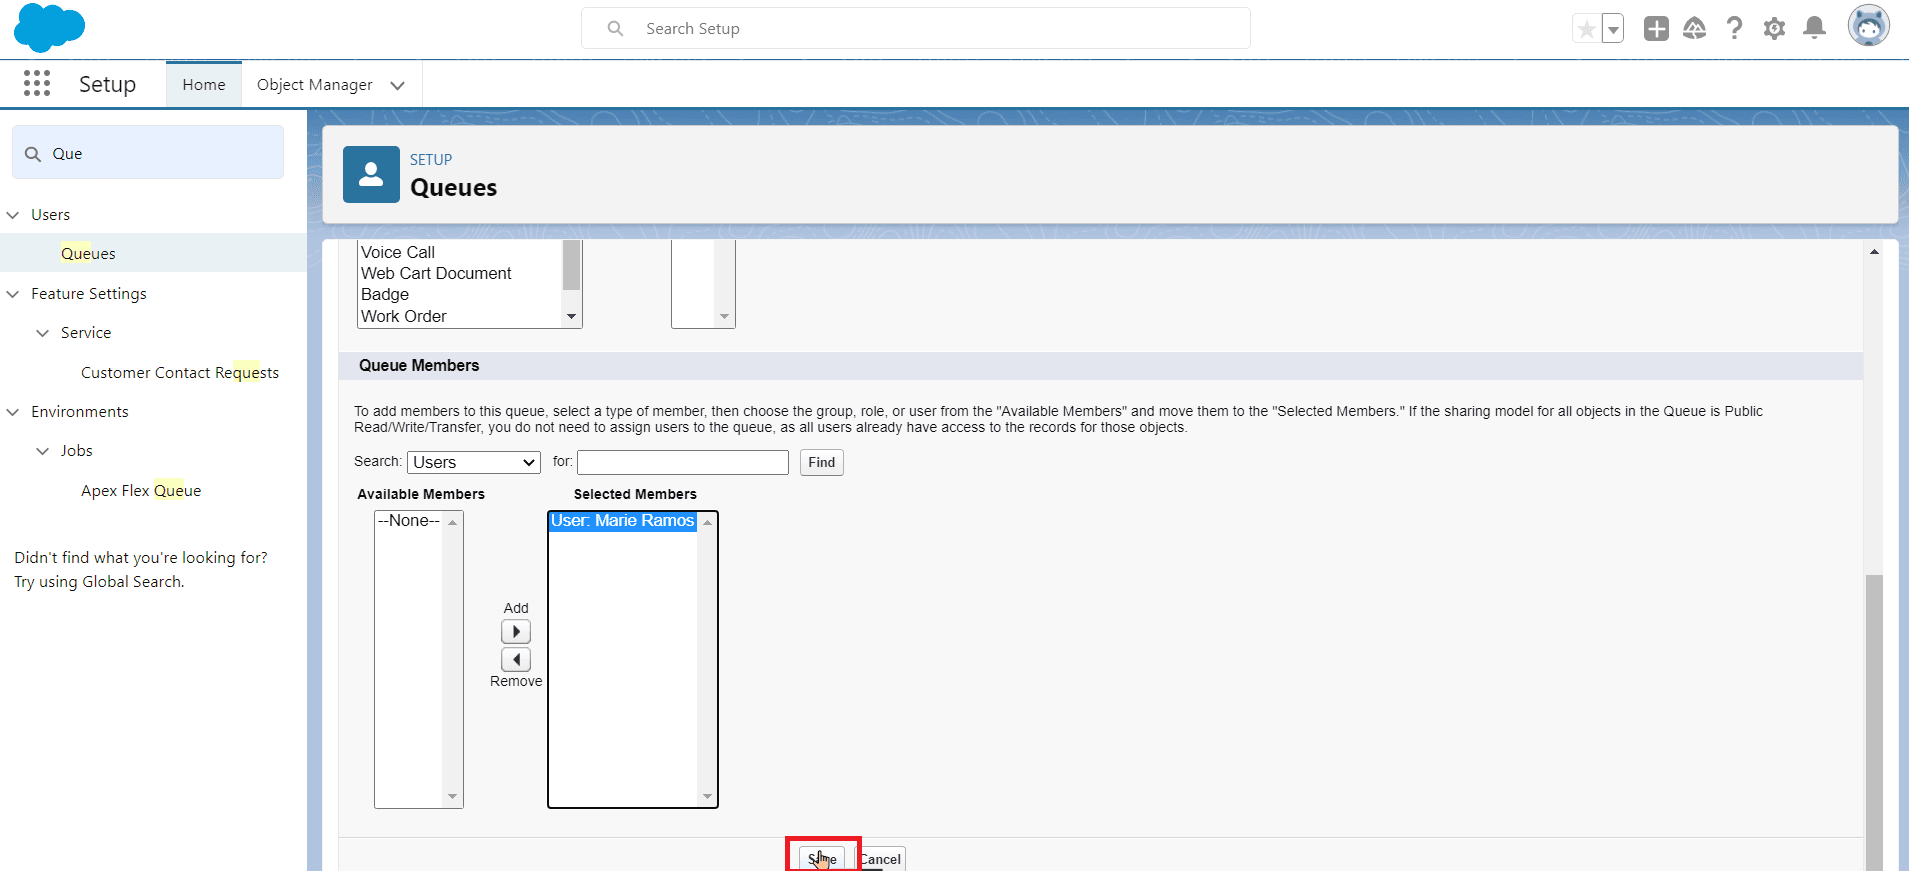
Select members to add to the queue (filtered by individual users, roles, or groups)
6
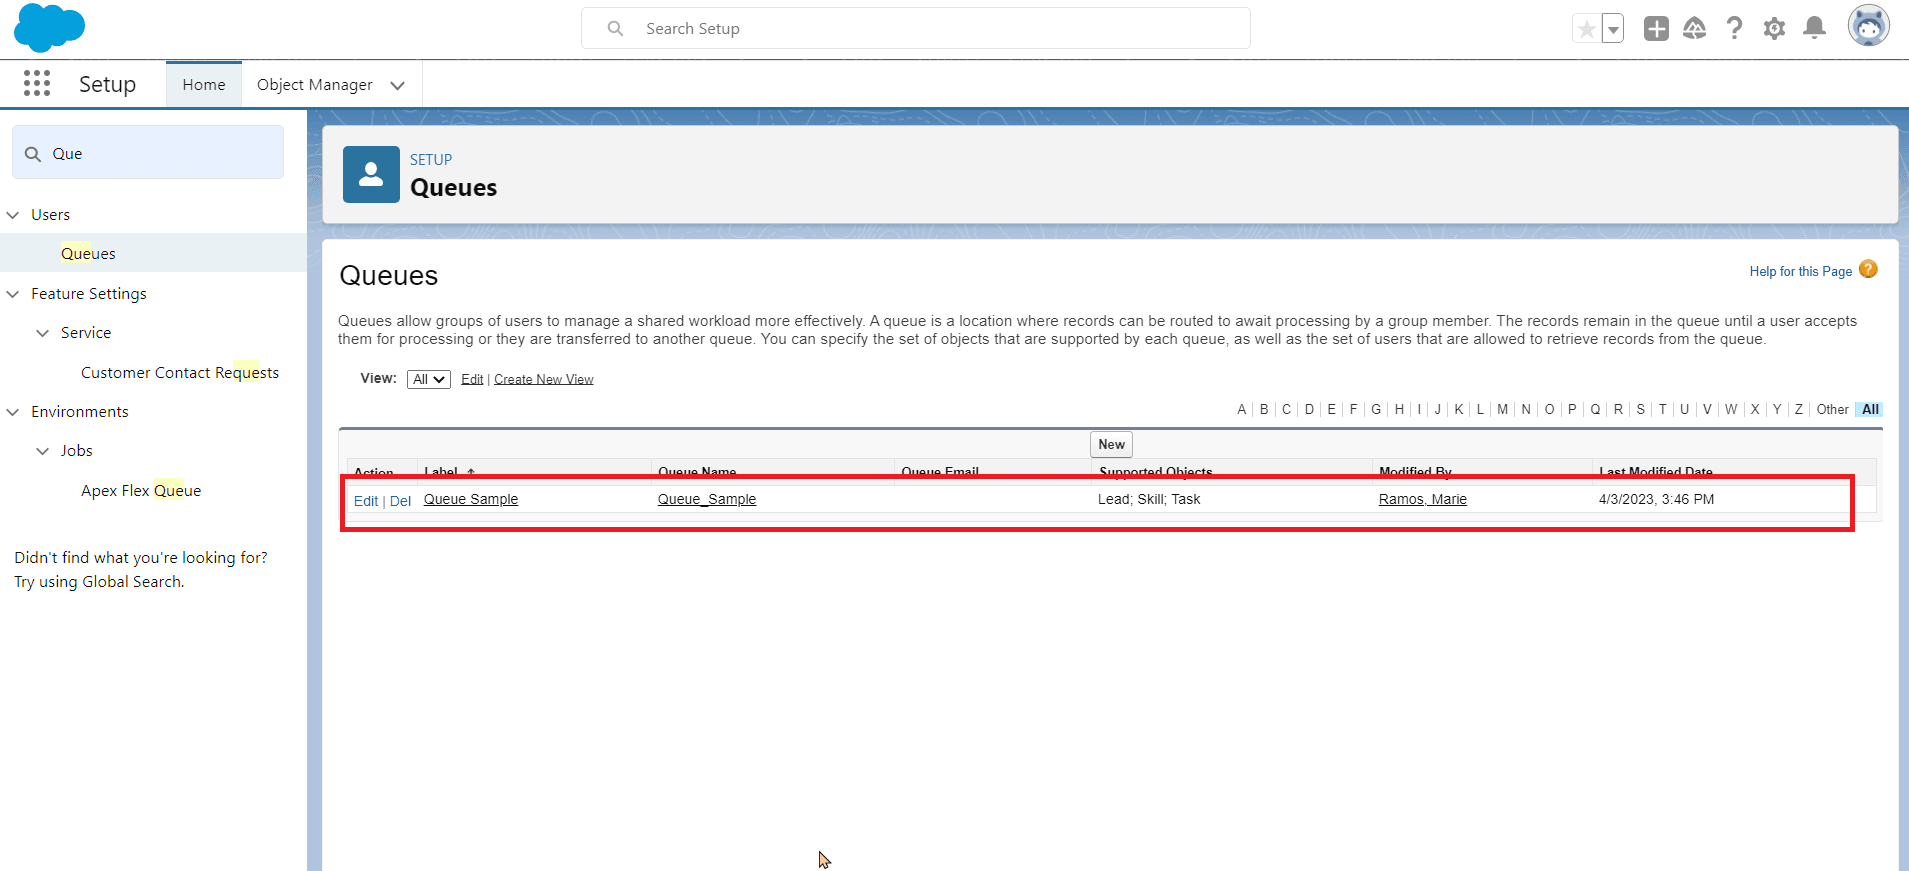
Click on "Save" to complete the queue setup
7
Set up assignment rules for your queue (optional) so that records meeting specific criteria are added to the queue automatically
Congratulations! You've mastered the art of optimizing lead routing in Salesforce. By implementing the strategies covered in this guide, you've created a seamless lead distribution process that maximizes sales potential. Keep analyzing and refining your lead routing approach to stay ahead of the competition and drive continued growth. Happy routing!
CRM
How to Create Custom Lead Fields in Salesforce

CRM
How to Optimize Salesforce Reports for Lead Insights

CRM
How to Use Lead Scoring in Salesforce to Prioritize Leads
CRM
Lead Management Metrics using Salesforce Reports/Dashboards

CRM
How to convert a lead to an opportunity in Salesforce
CRM
How to Automate Lead Follow-up with Salesforce Workflows


