How to Customize Crisp Chat Widget Based on User Activity
Welcome to our guide on customizing the Crisp Chat widget based on user activity. Enhance user experience with personalized interactions. In this guide, we'll show you how to tailor the chat widget to engage users effectively.
1
Log Into Your Crisp Account
Visit the Crisp website and enter your login credentials to access your account.
2
Go to Dashboard
You will be directed to your dashboard upon successful login.
3
Navigate to "Settings"
From your dashboard, locate and click on the "Settings" option.
4
Select "Chatbox & Email Settings"
In the settings menu, find and click on "Chatbox & Email Settings".
5
Choose "Chatbox Behavior"
In the "Chatbox & Email Settings", click on the "Chatbox Behavior" section.
6
Configure Behavior Settings
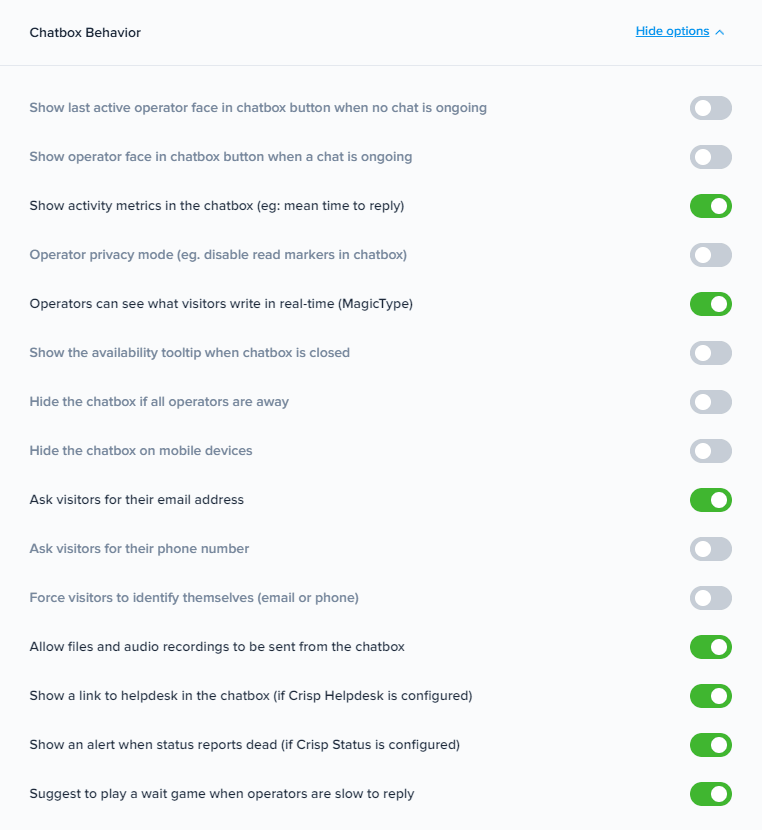
In this section, you can configure various settings like 'Auto-open', 'Send message typing events', and more. Adjust these settings based on your user behavior understanding.
7
Save Changes
After you're done setting up, it will automatically save the changes.
Congratulations! You've successfully learned how to customize the Crisp Chat widget based on user activity. By tailoring the chat widget to user behavior, you can offer personalized interactions, boost user engagement, and create a more satisfying experience. Continuously analyze user activity and adapt your customization to suit your audience's needs. Happy customizing!


