How to Update And Refine Your Auto Responses in Crisp Chat
Welcome to our guide on updating and refining your auto responses in Crisp Chat. Enhance customer interactions with improved responses. In this guide, we'll show you how to fine-tune your auto responses for better customer satisfaction.
1
Log in to Crisp
Input your username and password to access your account.
2
Go to Plugins
From the main dashboard, click on the 'Plugins' section.
3
Choose Auto Responder Plugin
Look for and select the 'Auto Responder' from the list of plugins.
4
Access Intents
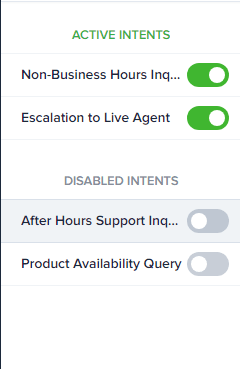
You will be presented with a list of previously created intents.
5
Select Intent to Update
Choose the intent whose auto-response you wish to update by clicking on it.
6
Edit Auto Response
In the opened intent, you will see the auto-response associated with it. Revise the text as needed to update the auto-response.
7
Save Changes
Once you're satisfied with the updates, click on 'Save' to apply the changes.
Congratulations! You've successfully learned how to update and refine your auto responses in Crisp Chat. By continuously improving your auto responses, you can provide prompt and accurate assistance to customers, streamline support, and boost customer satisfaction. Continuously analyze feedback and data to refine your auto responses further. Happy responding!


