
Collaborate with team members on workflows and automation
Welcome to our comprehensive guide on collaborative workflows and automation in HubSpot Service Hub. Effective collaboration is essential for streamlining processes and delivering exceptional customer service. In this guide, we'll show you how to harness the power of HubSpot's collaboration features to work seamlessly with your team members. Learn how to create, share, and optimize workflows together, ensuring everyone is on the same page. From assigning tasks to tracking progress, collaboration in HubSpot Service Hub empowers your team to provide top-notch support efficiently. Let's dive in and unlock the full potential of collaborative automation.
1
Access the Workflow Tool
Log in to your HubSpot account. Click on the "Automation" tab in the main menu. Select "Workflows" from the dropdown menu.
2
Create a New Workflow
Click the "Create workflow" button on the Workflows dashboard. Choose "Start from scratch" and click "Next." Select "Ticket-based" or "Deal-based" as your workflow type, depending on your needs, and click "Next." Name your workflow (e.g., "Task Management and Collaboration") and provide a brief description.
3
Set the Enrollment Triggers
Click the "Set up triggers" button. Choose the enrollment trigger for your workflow. For example, you could use "Ticket property" and select "Ticket status" to enroll tickets when they are created or reach a specific status. Set the desired criteria (e.g., "Ticket status" equals "New") and click "Apply filter."
4
Add Actions to Your Workflow
Click the "+" icon to add a new action. Choose the appropriate action(s) for your task management and collaboration process, such as creating tasks, assigning tasks to team members, or updating ticket properties. For each action, configure the necessary settings, such as setting task details, assigning tasks to specific team members, or specifying which ticket properties to update.
5
Set Delays and Conditional Branching
To add a delay between actions, click the "+" icon and select "Delay." Choose the duration of the delay (e.g., 1 hour, 1 day) and click "Save."
1
Conditional Branches
To create conditional branches, click the "+" icon and select "If/then branch." Set the condition (e.g., "Task completion" equals "Yes") and click "Save." Drag and drop actions for each branch (e.g., "Update ticket status" if the condition is met).
6
Test Your Workflow
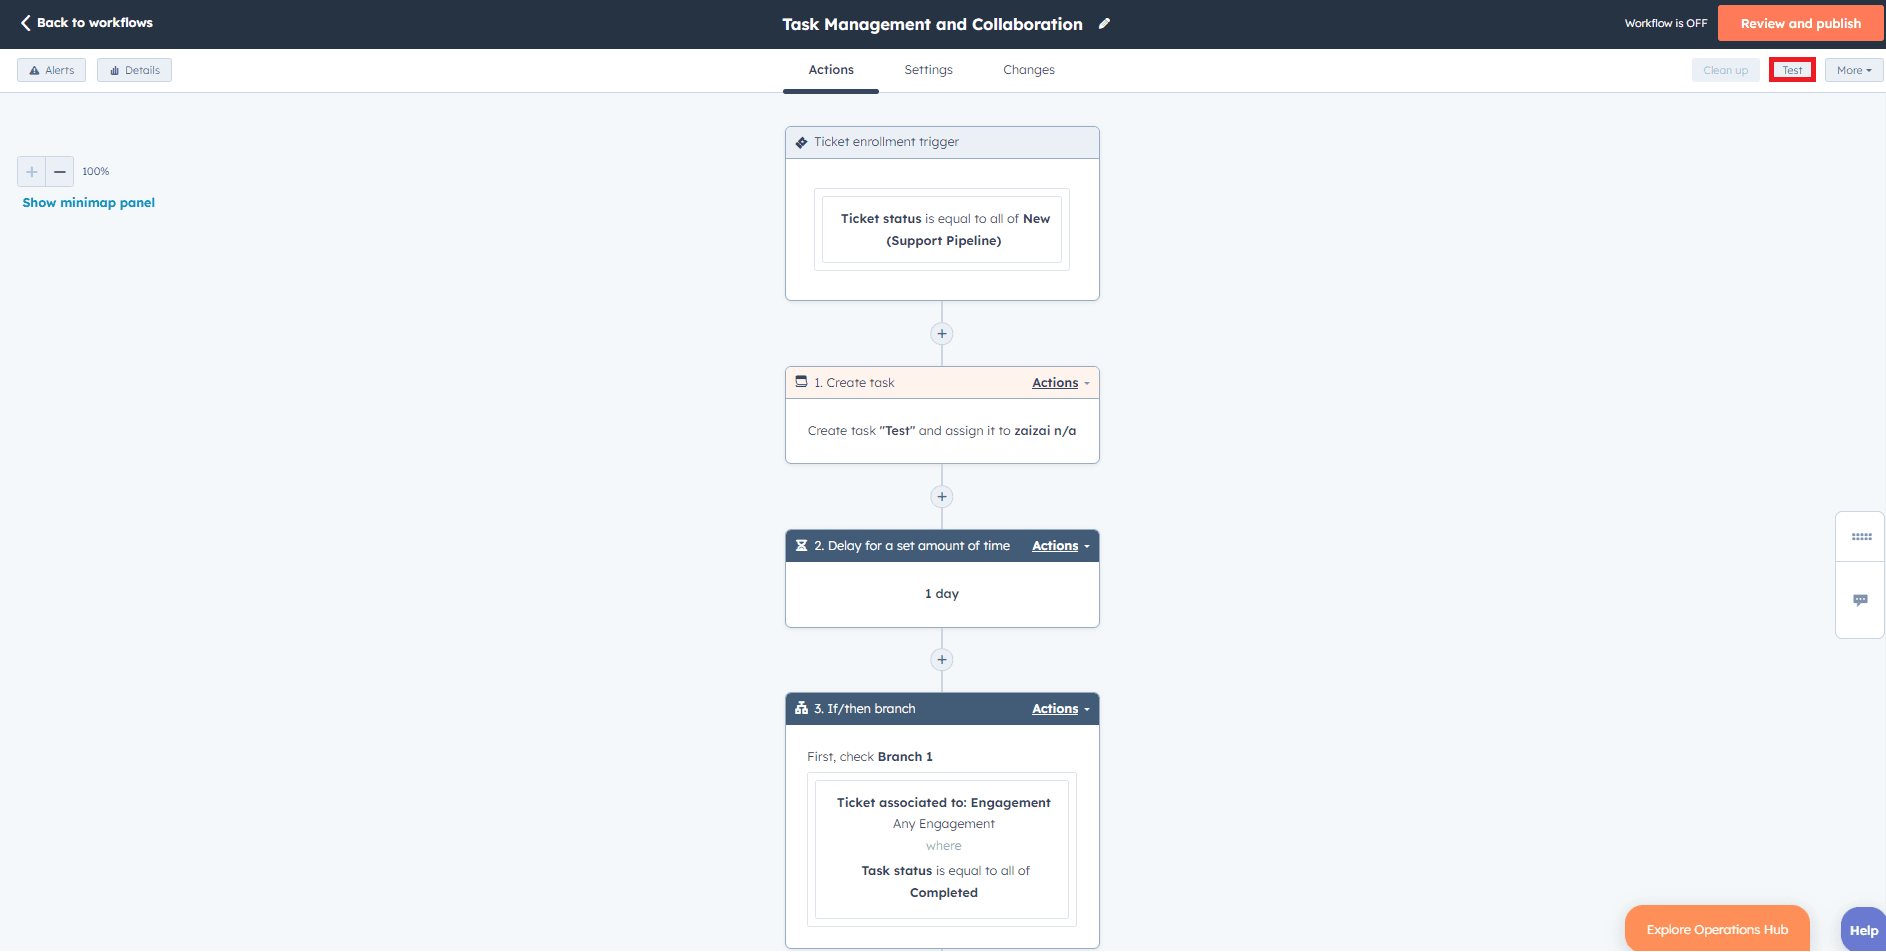
Use the "Test" tab at the top right corner to check the workflow functionality before activating it. Click "Run test" and choose a ticket or deal to simulate the workflow. Review the test results to ensure the workflow is functioning as intended.
7
Activate Your Workflow
Once you're satisfied with your workflow, click the "Review" tab. Review the summary of your workflow settings. Click "Activate" to enable your workflow.
Congratulations! You've mastered the art of team collaboration with HubSpot Service Hub. By working together, you've streamlined workflows, automated tasks, and provided outstanding customer service. Remember that collaboration is an ongoing process, and continuous communication with your team is key to success. As you grow and evolve, regularly review and update your workflows to meet changing needs and seize new opportunities. Encourage feedback and ideas from your team members, as their insights can lead to even more efficient processes. With HubSpot Service Hub's collaborative capabilities, your team is equipped to deliver exceptional customer experiences, build strong relationships, and propel your business to new heights.


