Time-Based Workflows for Follow-ups & Reminders - Help-Scout
Welcome to our comprehensive guide on setting up time-based workflows in Help Scout to streamline follow-ups and reminders. Efficiently managing customer interactions is crucial for building strong relationships and ensuring timely responses. In this guide, we'll walk you through the process of creating time-based rules and automated actions in Help Scout. Learn how to schedule follow-up emails, set reminders for pending tasks, and optimize your support team's productivity. With these time-based workflows in place, you can enhance customer satisfaction, reduce manual efforts, and stay on top of critical tasks. Let's dive in and unlock the power of automated follow-ups and reminders in Help Scout.
1
Log in to your Help Scout account
First, navigate to the Help Scout website (https://www.helpscout.com/) and log in to your account using your registered email address and password.
2
Access the Workflows section
1
Click "Manage"
Once logged in, click on the "Manage" option located at the top-right corner of the dashboard
2
Choose a “Mailbox”
Choose a “Mailbox” from the choices.
3
Select "Workflows"
Then, select "Workflows" from the dropdown menu.
3
Create a new Workflow

On the Workflows page, click the "New Workflow" button in the upper-right corner.
4
Configure the Workflow settings

1
Name your Workflow
In the "Name your workflow" field, enter a descriptive name for your workflow, such as "Time-Based Follow-ups and Reminders."
2
Set the Workflow Type
Select "Automatic" as the workflow type.
5
Add conditions
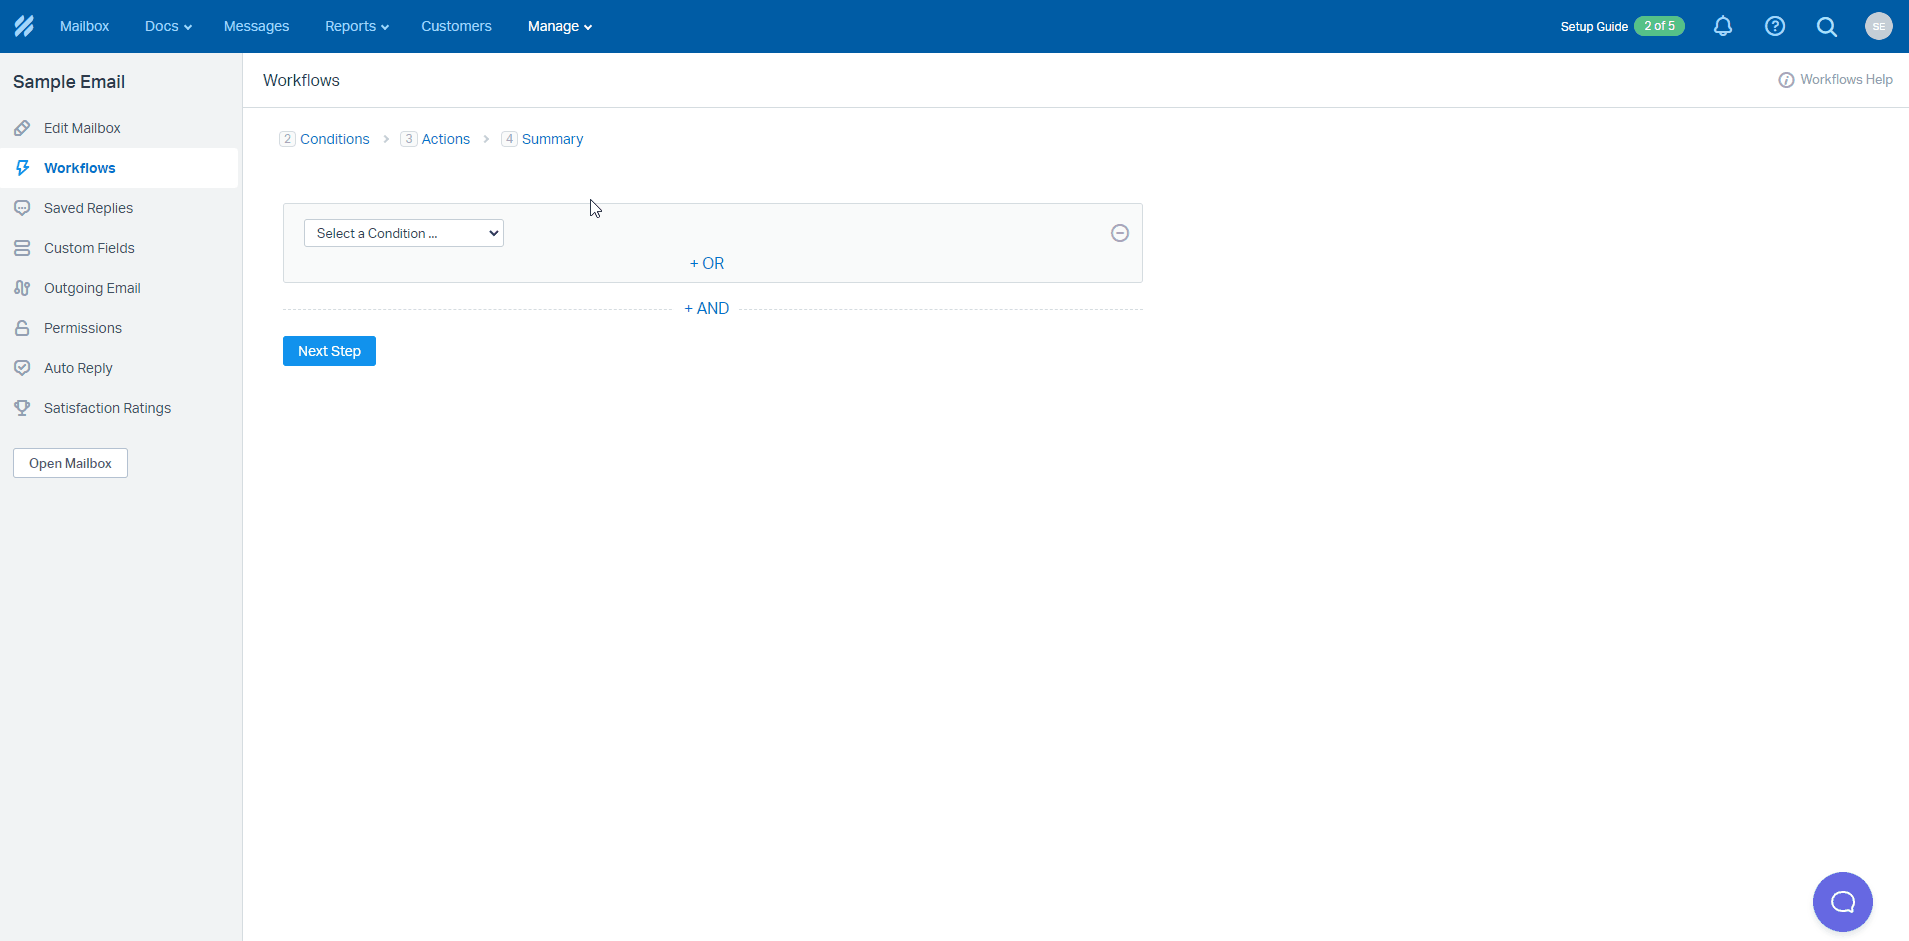
Click the "Add conditions" button to set the criteria that must be met for the workflow to trigger. Examples of conditions include the conversation status, tags, or specific keywords in the subject or body of a message. Make sure the conditions match the intended purpose of your follow-ups or reminders.
6
Add actions
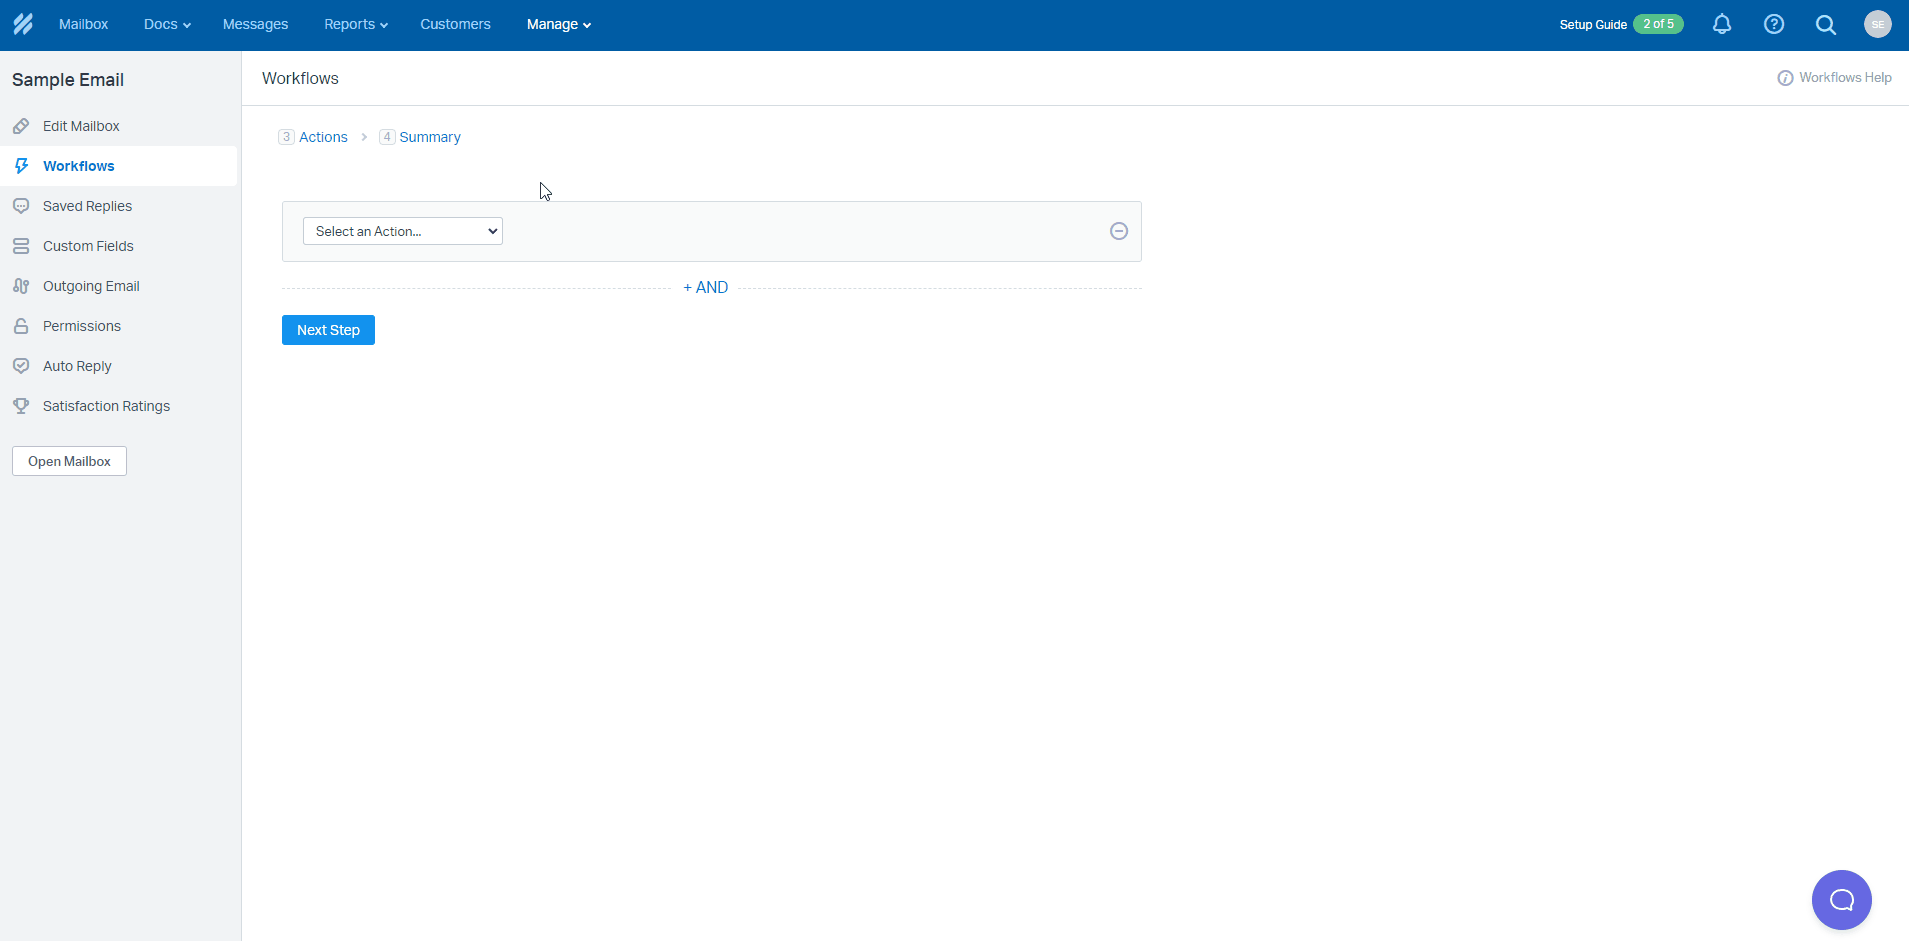
Click the "Add actions" button to define what happens when the workflow is triggered. Possible actions include sending an email, adding or removing a tag, changing the conversation status, or assigning the conversation to a team member. You can also use placeholders, such as {customer.firstName}, to personalize your follow-up or reminder messages.
7
Save and activate the Workflow
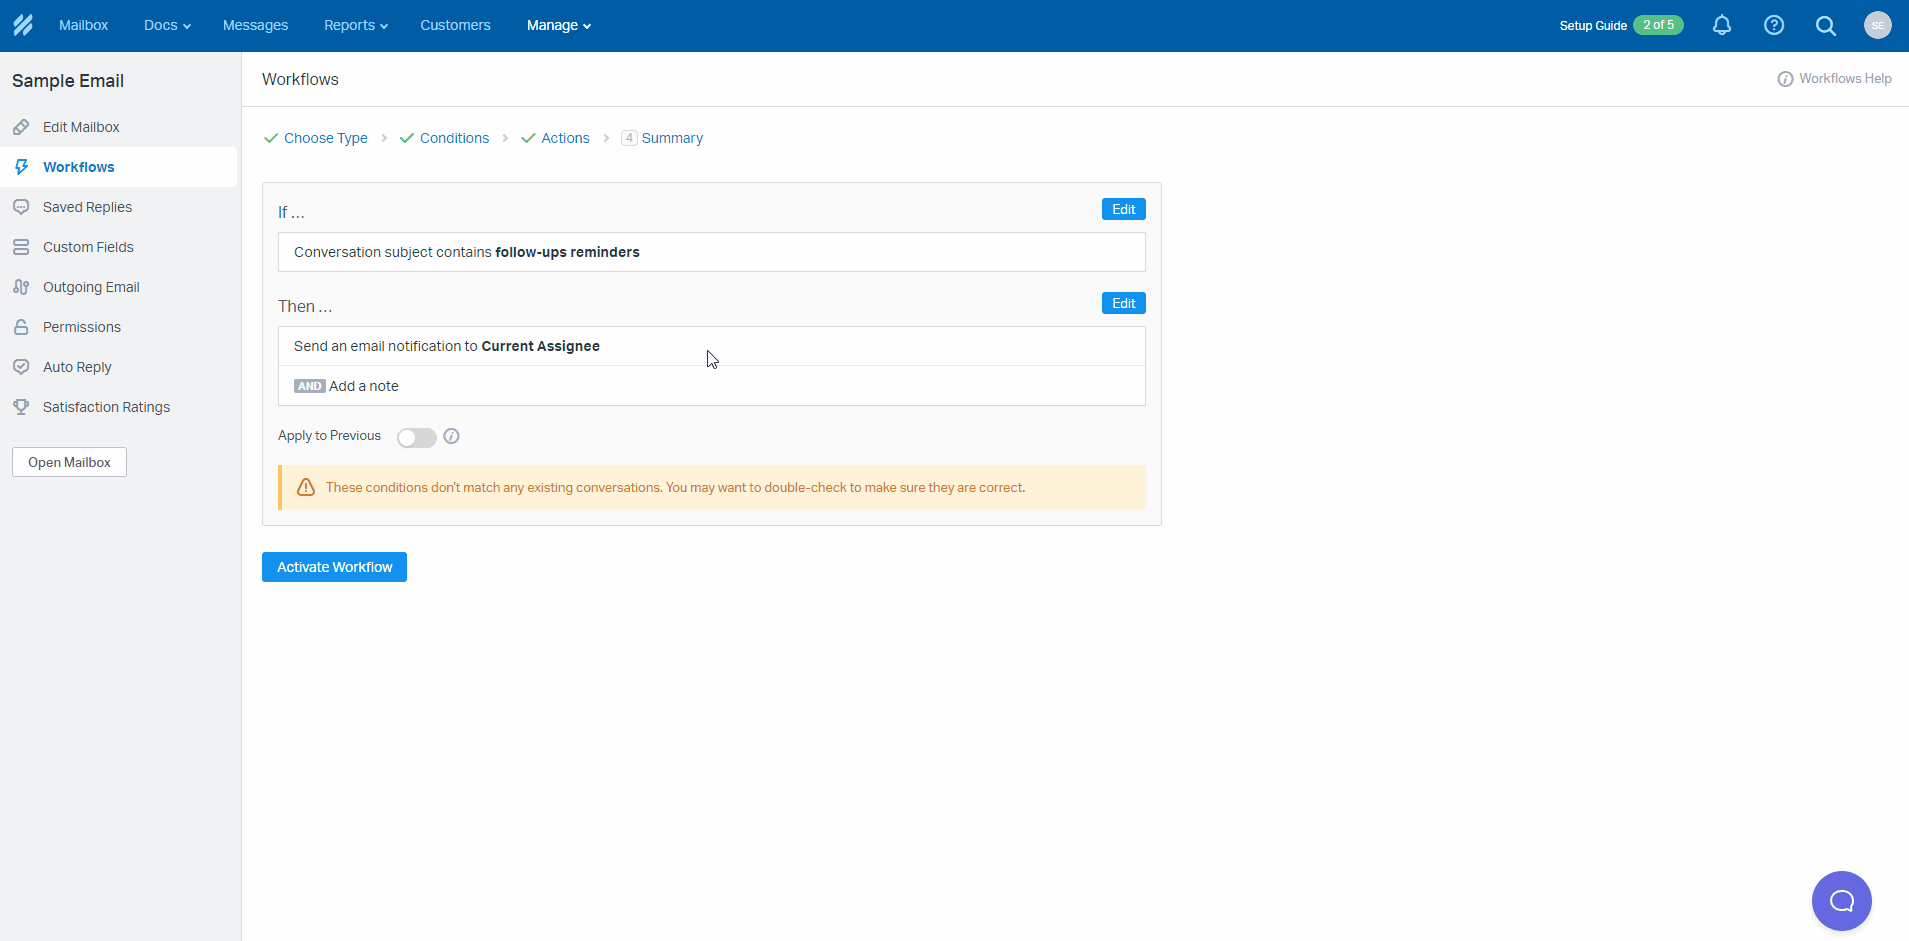
Once you are satisfied with your time-based workflow, click the "Activate Workflow" button to save your settings.
Congratulations on successfully setting up time-based workflows for follow-ups and reminders in Help Scout! By leveraging automation, you've empowered your support team to deliver timely responses and keep track of important tasks effortlessly. The streamlined processes will undoubtedly lead to higher customer satisfaction and improved team productivity. Continue to monitor the performance of your workflows and make necessary adjustments to ensure they align with your evolving business needs. Remember, time-based automation is a powerful tool in your customer support arsenal, and it will continue to yield valuable benefits as you grow and scale your operations. Thank you for joining us on this journey, and may your Help Scout workflows drive exceptional customer experiences every step of the way.


