Integrating HubSpot Service Hub with E-commerce platforms
Welcome to our comprehensive guide on integrating HubSpot Service Hub with E-commerce platforms. Streamlining your customer support and sales processes is essential for a successful E-commerce business. By integrating HubSpot Service Hub with your E-commerce platform, you can centralize customer data, automate support tasks, and provide personalized experiences. In this guide, we'll walk you through the step-by-step process of integrating HubSpot Service Hub with popular E-commerce platforms, such as Shopify, WooCommerce, and Magento. Unlock the full potential of your E-commerce business by seamlessly connecting customer interactions and sales data, leading to improved customer satisfaction and increased revenue.
1
Choose Your E-commerce Platform

First, decide which e-commerce platform you want to connect with HubSpot. Some popular options include Shopify, WooCommerce, and BigCommerce. For this guide, we'll use Shopify as an example.
2
Create or Sign in to Your Shopify Account
To integrate Shopify with HubSpot, you'll need to have a Shopify account. If you don't have one already, sign up for a Shopify account at https://www.shopify.com/. Otherwise, sign in to your existing Shopify account.
3
Install the HubSpot App in Your Shopify Store
Log in to your Shopify account and navigate to the Shopify App Store by clicking on 'Apps' > 'Visit Shopify App Store.' In the App Store, search for "HubSpot" using the search bar. Click on the 'HubSpot' app in the search results, and then click the 'Add app' button to install the HubSpot app in your Shopify store.
4
Connect Your Shopify Store to HubSpot
After installing the HubSpot app, you'll be prompted to connect your Shopify store to your HubSpot account. Click on the 'Connect' button. Sign in to your HubSpot account (or create a new one if you don't have an account yet) and grant the necessary permissions to allow the HubSpot app to access your Shopify store. Your Shopify store is now connected to HubSpot.
5
Configure Your HubSpot Settings
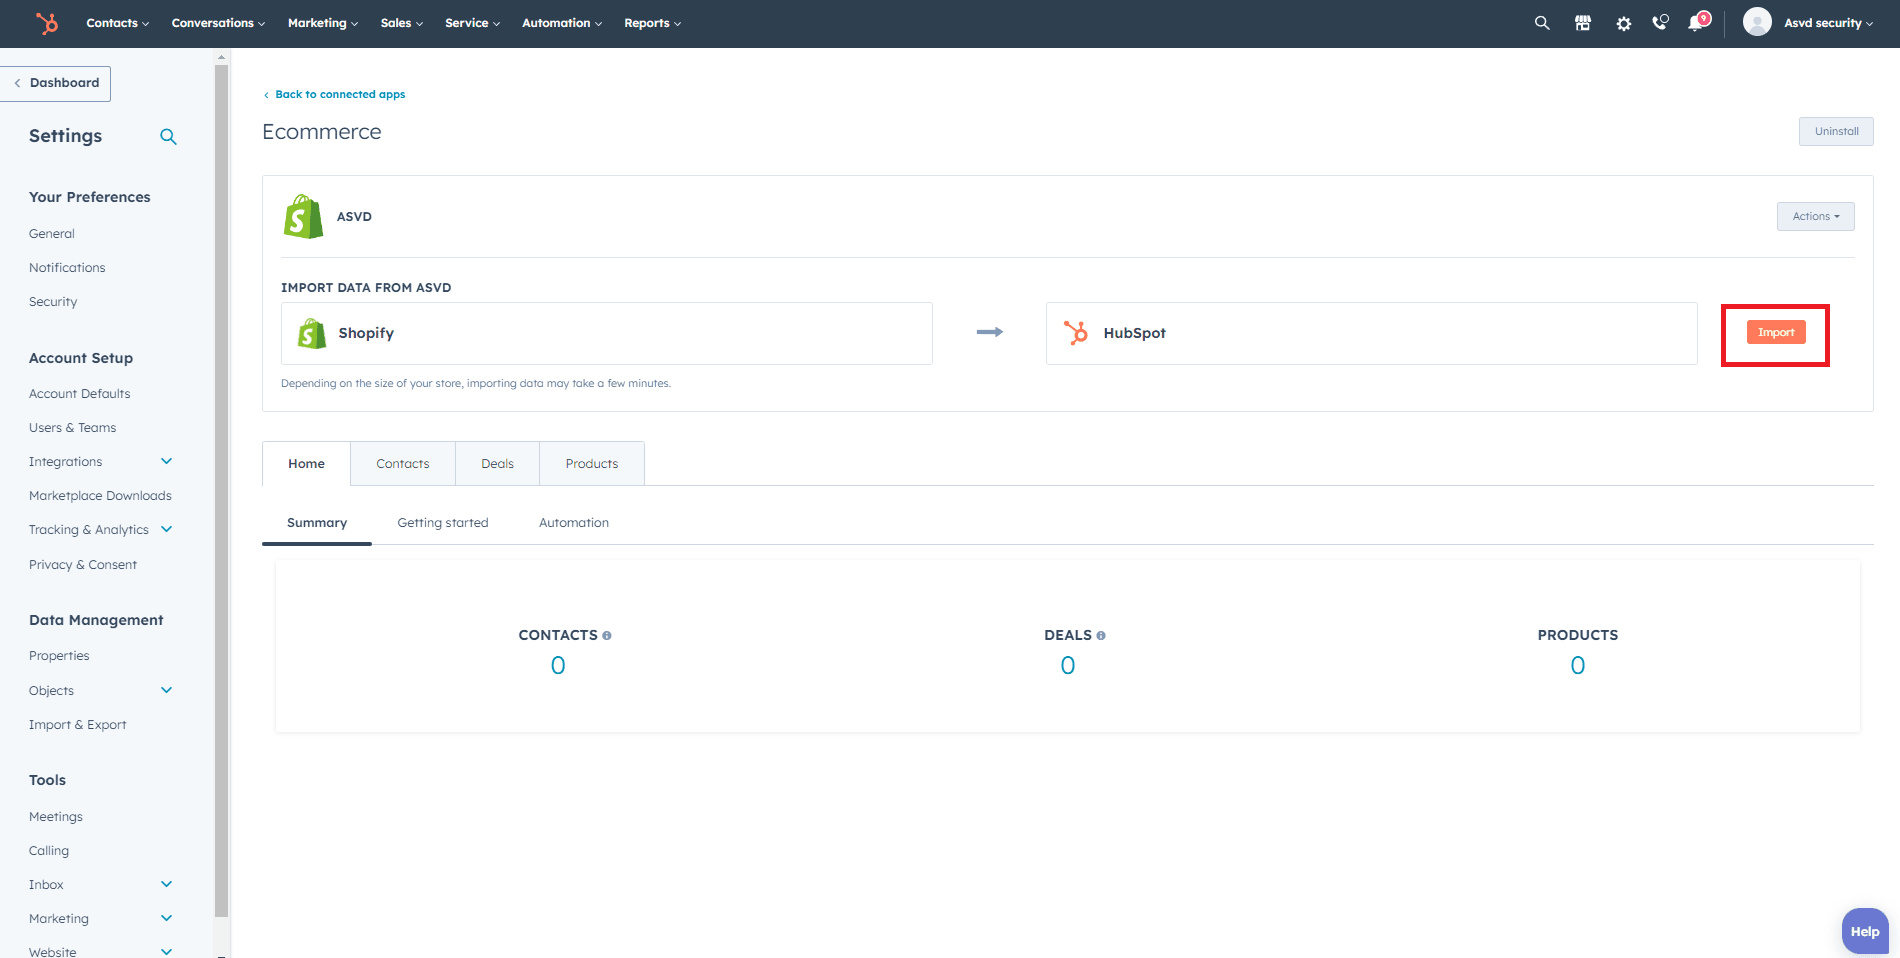
Configure the settings for syncing customer data, orders, products, and other store data with HubSpot. Save your settings to apply the changes.
6
Create and Manage Marketing and Sales Campaigns in HubSpot
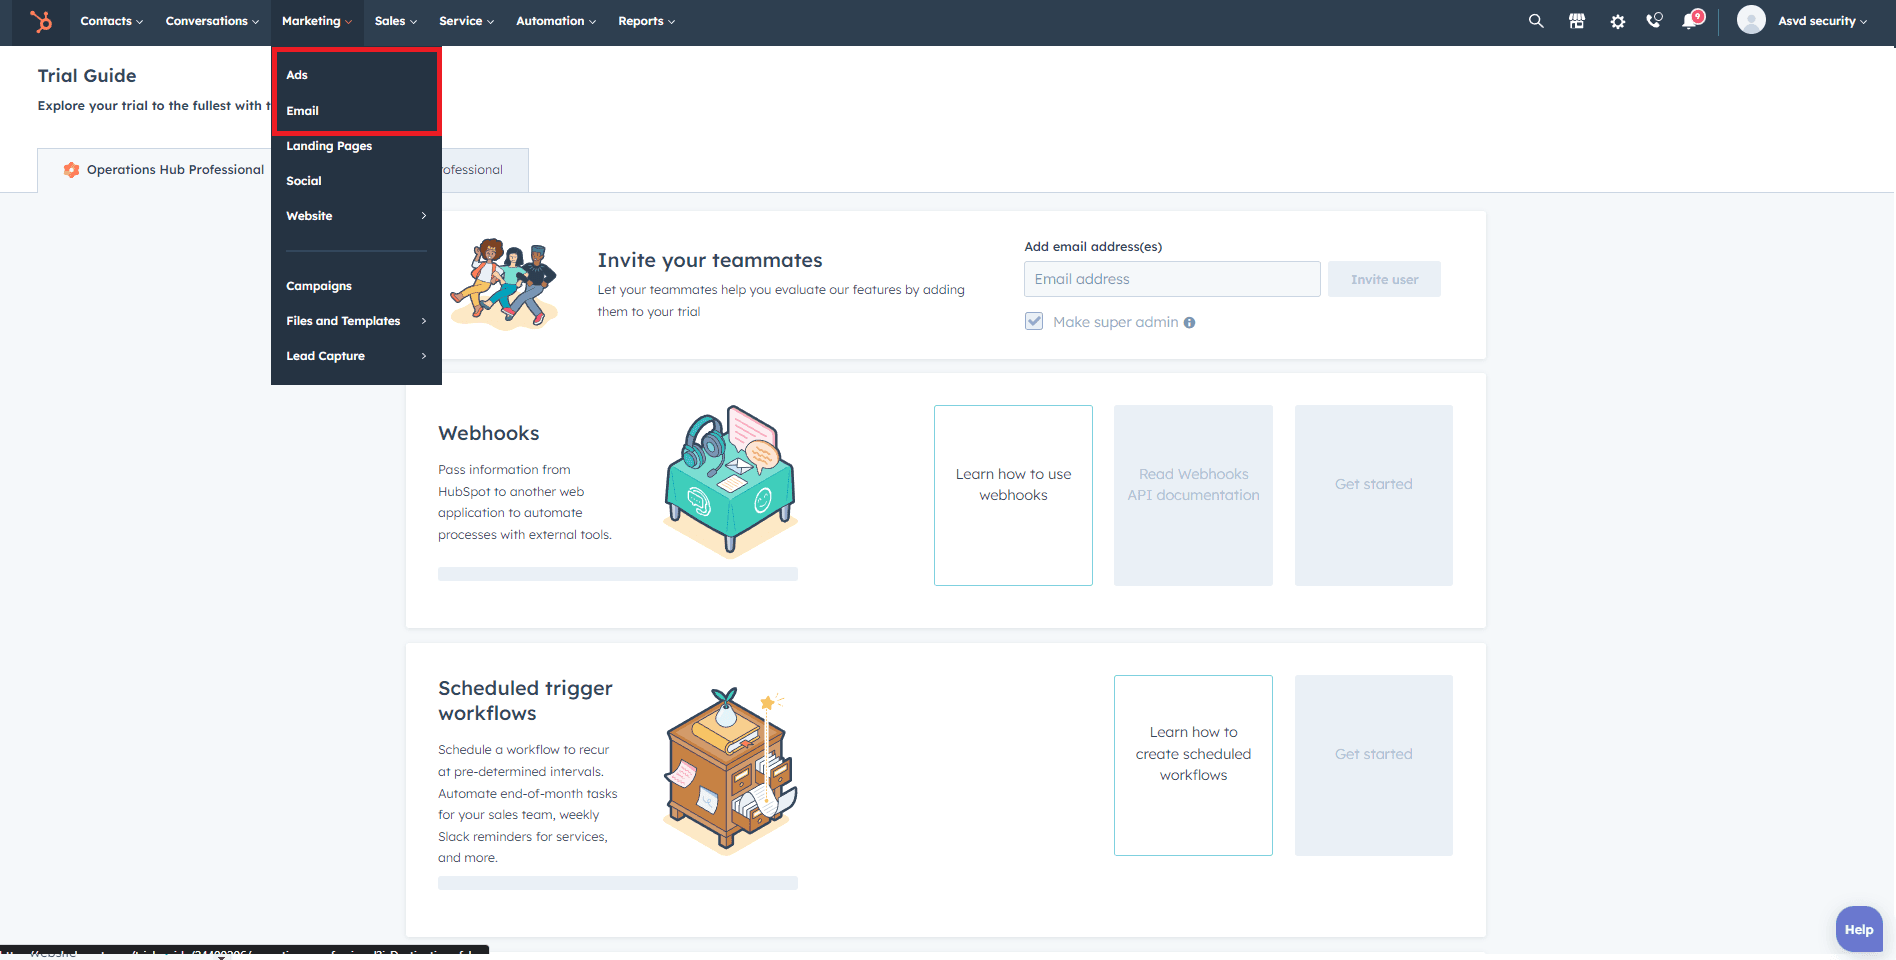
- Log in to your HubSpot account and navigate to 'Marketing' > 'Email' or 'Ads.'
- Create targeted email campaigns or ad campaigns using the customer data synced from your Shopify store.
- Set up workflows and automation rules to personalize your marketing efforts and segment your customers based on their behavior or preferences.
Congratulations! You've successfully integrated HubSpot Service Hub with your E-commerce platform, elevating your customer support and sales capabilities. With centralized customer data and automated support tasks, you can deliver personalized experiences to every customer, fostering long-term relationships and loyalty. Remember to regularly analyze the data insights and performance metrics provided by the integration to make data-driven decisions and optimize your support and sales processes continuously. Embrace the power of a seamless connection between HubSpot Service Hub and your E-commerce platform to provide exceptional customer experiences, drive conversions, and propel your business towards success in the competitive E-commerce landscape.